Cisco ASA - multiple context configuration
Description
A single Cisco ASA can be partitioned into multiple virtual devices, known as security contexts. Each context acts as an independent device, with its own security policy, interfaces, and administrators. Multiple contexts are similar to having multiple standalone devices (note, that not all features are supported in multiple context mode).
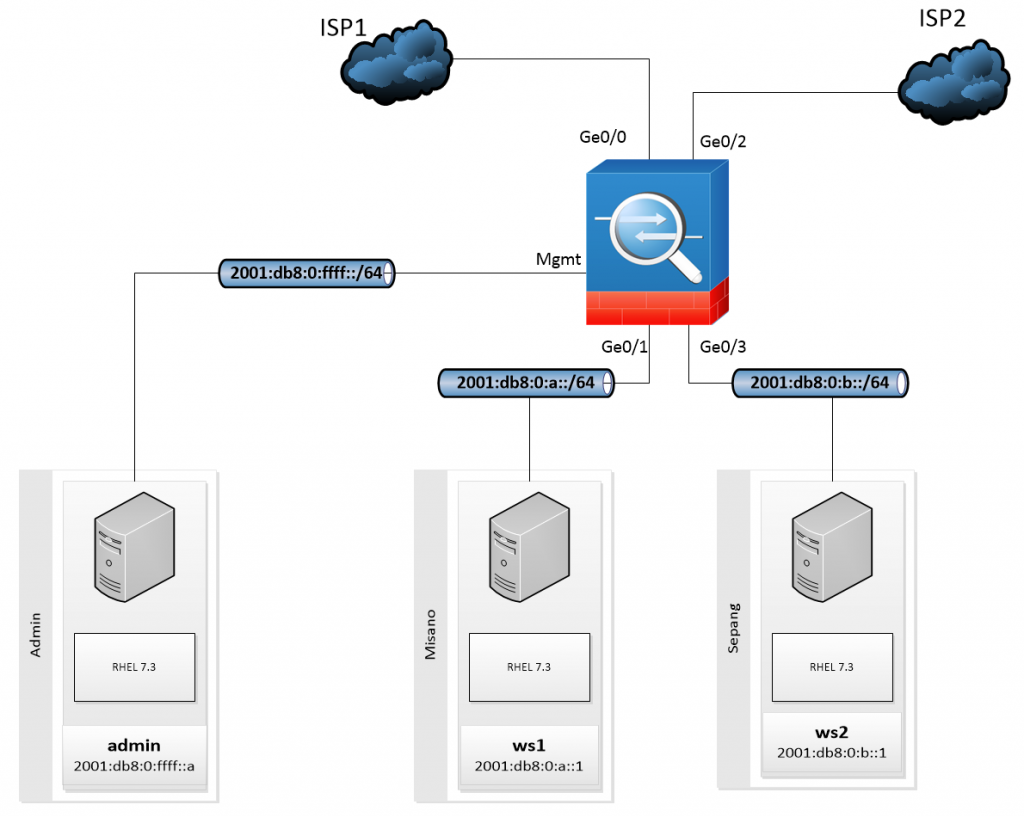
Lab Schema
Preconfiguration
1. Start with default configuration
ciscoasa> enable
Password:
ciscoasa# conf t
ciscoasa(config)# configure factory-default
Based on the management IP address and mask, the DHCP address
pool size is reduced to 253 from the platform limit 256
WARNING: The boot system configuration will be cleared.
The first image found in disk0:/ will be used to boot the
system on the next reload.
Verify there is a valid image on disk0:/ or the system will not boot.
Begin to apply factory-default configuration:
Clear all configuration
Executing command: interface management0/0
Executing command: nameif management
INFO: Security level for "management" set to 0 by default.
Executing command: ip address 192.168.1.1 255.255.255.0
Executing command: security-level 100
Executing command: no shutdown
Executing command: exit
Executing command: http server enable
Executing command: http 192.168.1.0 255.255.255.0 management
Executing command: dhcpd address 192.168.1.2-192.168.1.254 management
Executing command: dhcpd enable management
Executing command: logging asdm informational
Factory-default configuration is completed
ciscoasa(config)# reload save-config noconfirm
2. Create local user with privilege level 15 (admin/superadmin)
ciscoasa# conf t
ciscoasa(config)# username admin password superadmin privilege 15
3. Enable https server (allow access from ASDM using local user)
ciscoasa(config)# http server enable
ciscoasa(config)# http 2001:db8:0:ffff::/64 management
ciscoasa(config)# aaa authentication http console LOCAL
4. Configure management interface
ciscoasa# conf t
ciscoasa(config)# int management 0/0
ciscoasa(config-if)# ipv6 address 2001:db8:0:ffff::ffff/64
ciscoasa(config)# wri
Building configuration...
Cryptochecksum: fb58cbdd 09caa914 3b3b8a4f fc491ff2
2933 bytes copied in 0.710 secs
[OK]
ciscoasa(config)#
5. Check interface config
ciscoasa# sh ipv6 interface management | grep 2001
2001:db8:0:ffff::ffff, subnet is 2001:db8:0:ffff::/64
ciscoasa#
6. Connect to ASA using ASDM and IPv6 address
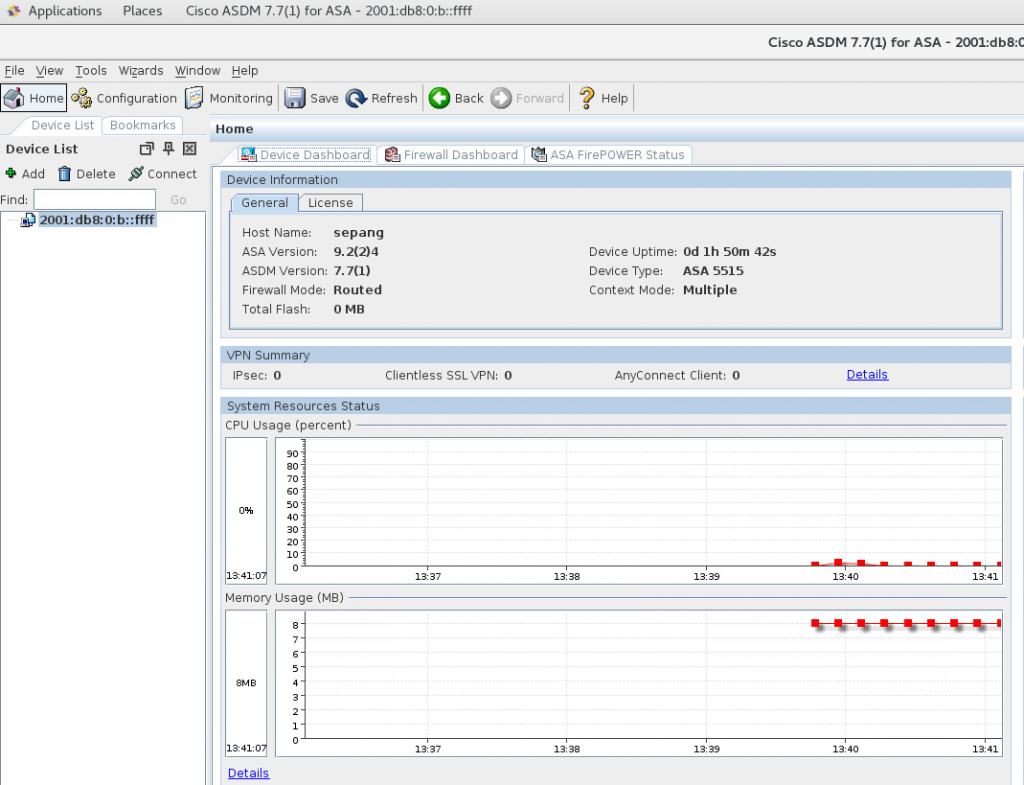
Use browser to open https://[2001:db8:0:ffff::ffff]/
Log into ASDM using previously created user

Configs
7. Switch to multi context mode:
ciscoasa# conf t
ciscoasa(config)# mode multiple
WARNING: This command will change the behavior of the device
WARNING: This command will initiate a Reboot
Proceed with change mode? [confirm] Y
Convert the system configuration? [confirm] Y

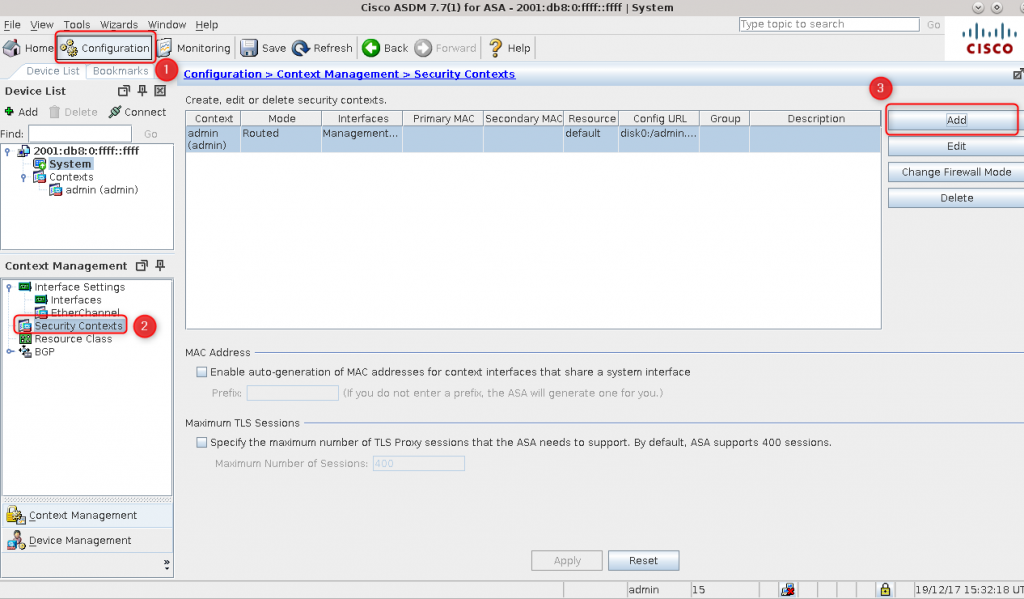
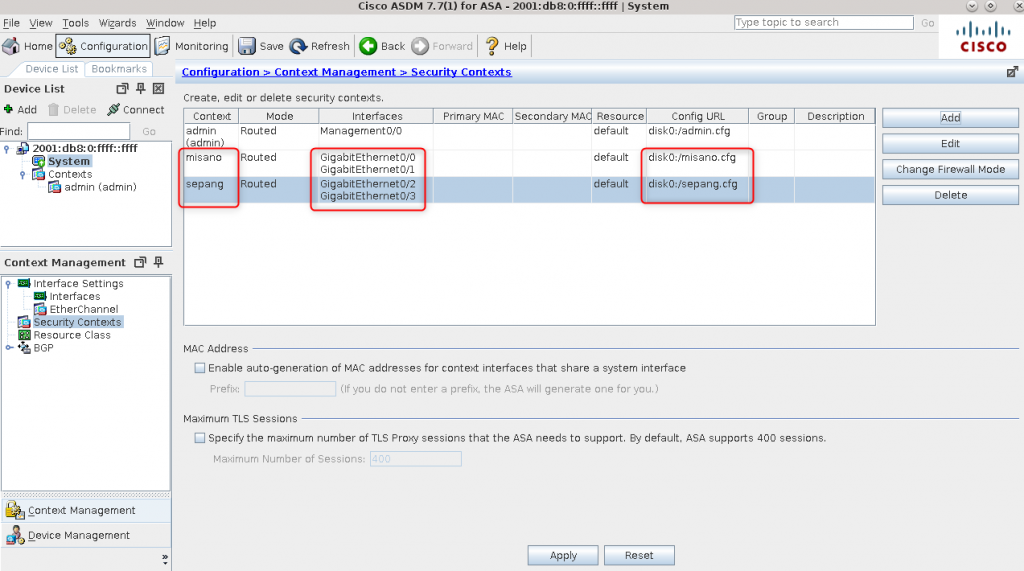
8. Create contexts, assign interfaces and set context config location:
context misano
allocate-interface GigabitEthernet0/2 visible
allocate-interface GigabitEthernet0/3 visible
config-url disk0:/misano.cfg
context sepang
allocate-interface GigabitEthernet0/0 visible
allocate-interface GigabitEthernet0/1 visible
config-url disk0:/sepang.cfg
9. Enable interfaces
Interface GigabitEthernet0/0
no shutdown
Interface GigabitEthernet0/1
no shutdown
Interface GigabitEthernet0/2
no shutdown
Interface GigabitEthernet0/3
no shutdown
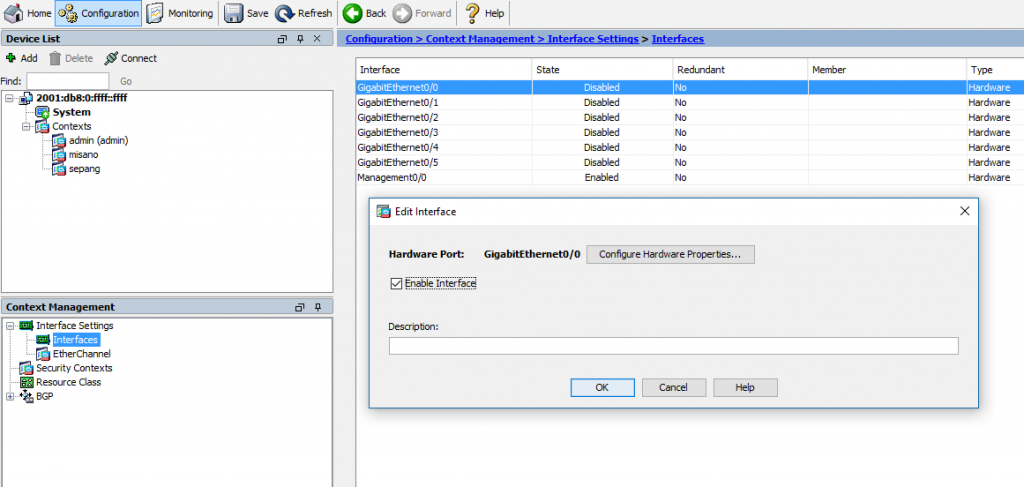
10. List active contexts:
ciscoasa# show context
Context Name Class Interfaces Mode URL
*admin default Management0/0 Routed disk0:/admin.cfg
misano default GigabitEthernet0/0, Routed disk0:/misano.cfg
GigabitEthernet0/1
sepang default GigabitEthernet0/2, Routed disk0:/sepang.cfg
GigabitEthernet0/3
Total active Security Contexts: 3

Following must be done for both contexts
11. Configure IPv6 on all interfaces
Interface inside
nameif inside
ipv6 enable
ipv6 address 2001:db8:0:b::ffff/64
security-level 100

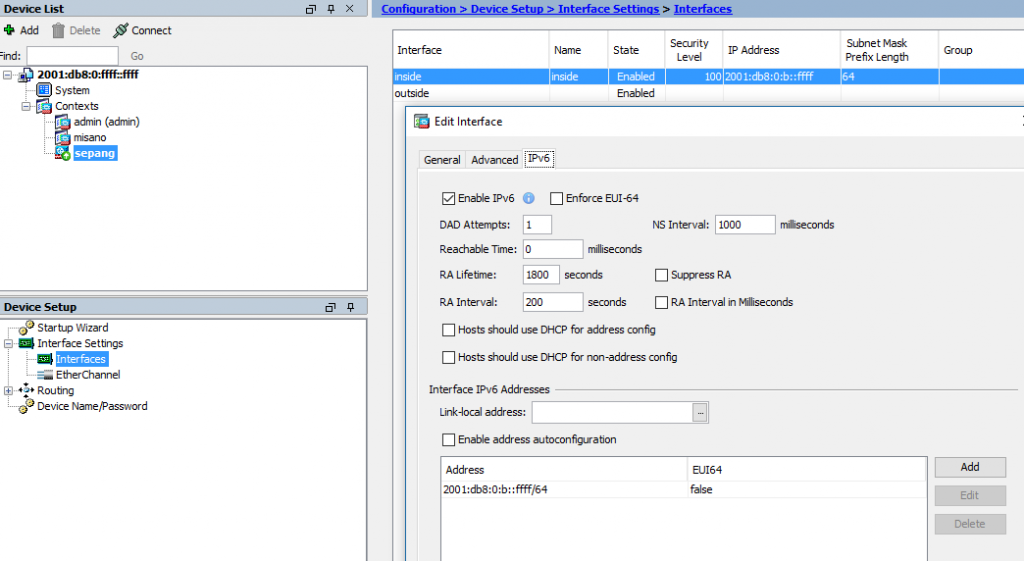
12 Create local admin and allow him log via ssh/ASDM
username tom password ********** encrypted privilege 15
aaa authentication http console LOCAL
aaa authentication ssh console LOCAL


13. Allow access from 2001:db8:0:b::/64 to ASDM and ssh
http server enable
http 2001:db8:0:b::/64 inside
ssh 2001:db8:0:b::/64 inside

14. Generate keys to allow log via ssh
crypto key generate rsa noconfirm

Test Area
15. Check connection to both ASA contexts using dedicated admin (ssh)
[radkowski@cube ~]$ ping6 2001:db8:0:b::ffff -c1
PING 2001:db8:0:b::ffff(2001:db8:0:b::ffff) 56 data bytes
64 bytes from 2001:db8:0:b::ffff: icmp_seq=1 ttl=64 time=0.379 ms
--- 2001:db8:0:b::ffff ping statistics ---
1 packets transmitted, 1 received, 0% packet loss, time 0ms
rtt min/avg/max/mdev = 0.379/0.379/0.379/0.000 ms
[radkowski@cube ~]$ ssh 2001:db8:0:b::ffff -l tom
tom@2001:db8:0:b::ffff's password:
Type help or '?' for a list of available commands.
ciscoasa/sepang> enable
Password:
ciscoasa/sepang# sh context detail
Context "sepang", has been created
Config URL: disk0:/sepang.cfg
Interfaces: inside, outside
IPS Sensors:
Class: default, Flags: 0x00000811, ID: 3
ciscoasa/sepang#exit

16. Check connection to both ASA contexts using dedicated admin (ASDM)
Open following URL via browser: https://[2001:db8:0:b::ffff]
Be aware - your browser must support java
